- MuMu berhenti merespons saat memuat atau membeku pada 40%
- MuMu berhenti merespons saat memuat atau membeku pada 100%
- MuMu stops responding while loading or freezes at 45%
- MuMu stops responding while loading or freezes at 30%
- MuMu stops responding while loading, freezes at 99%, or prompts a reason unknown error
- MuMu stops responding while loading or freezes at 10%
- PC masuk ke layar biru setelah memulai emulator
- Desktop emulator memiliki layar splash dan ikon diagonal
- Desktop menjadi ukuran yang berbeda setelah memulai emulator dan tidak berfungsi dengan baik
- Program Berulang tidak merespons
- Installation & Startup Error Codes
- Way to solve Graphics spec. too low for dx 11.0 or OpenGL 4.3
- The Emulator Failed to Respond
- Enable VT on Biostar
- Enable VT on Maxsun
- Enable VT on Jetway
- Enable VT on Soyo
- Enable VT on Colorful
- How to enable VT
- Enabling VT in Toshiba PCs
- Enabling VT in MSI PCs
- Enabling VT in Lenovo PCs
- Enabling VT in HP PCs
- Enabling VT in Gigabyte PCs
- Enabling VT in Dell PCs
- Enabling VT in ASUS PCs
- Enabling VT in ASRock PCs
- Enabling VT in Acer PCs
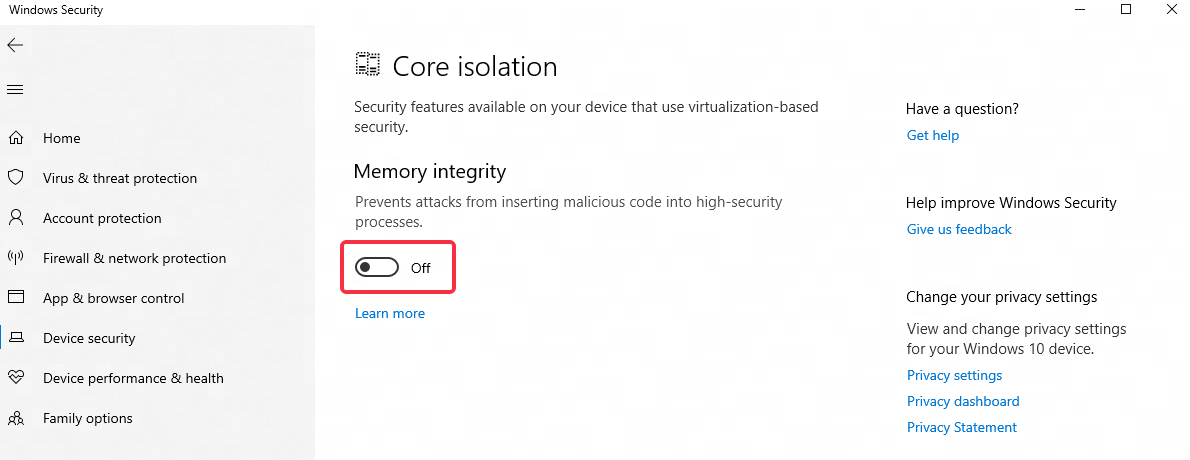
The technologies used by Microsoft's "Core Isolation" and "Hyper-V/VBS" conflict with MuMu Player 12, causing the emulator to run inefficiently or unable to run. It is recommended to turn off "Core Isolation" and disable "Hyper-V/VBS" when running MuMu Player 12. Turning off core isolation will not affect security. If you are worried, you can install other security software. You can turn off core isolation, Hyper-V/VBS by following the steps below:
1. Turn off core isolation
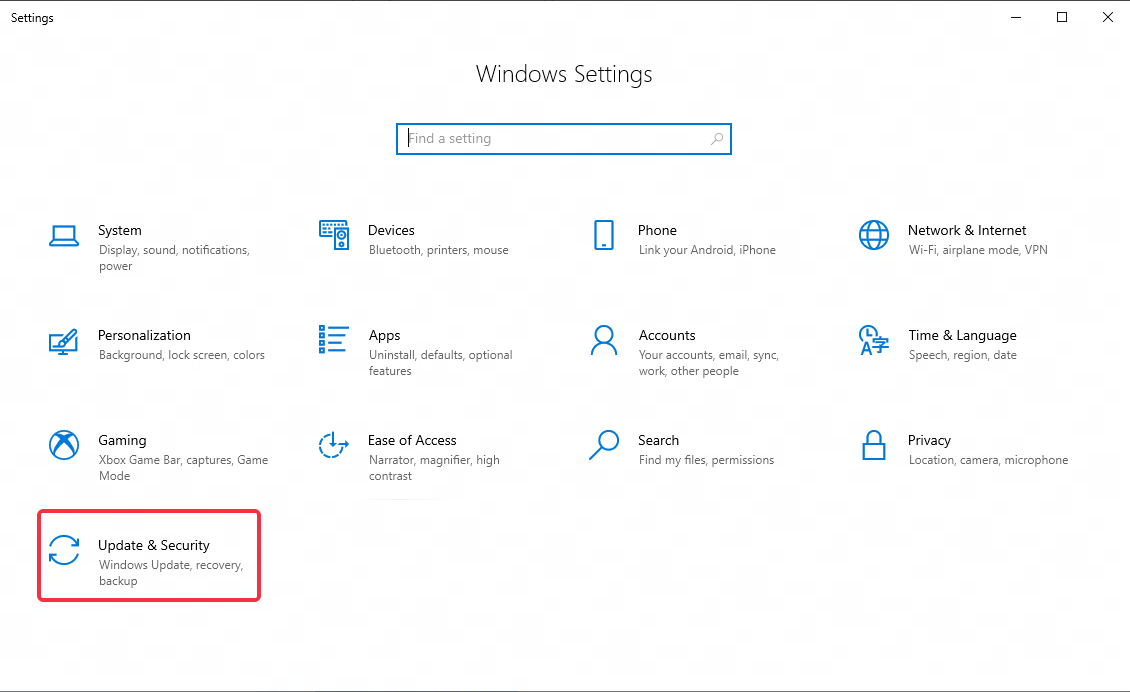
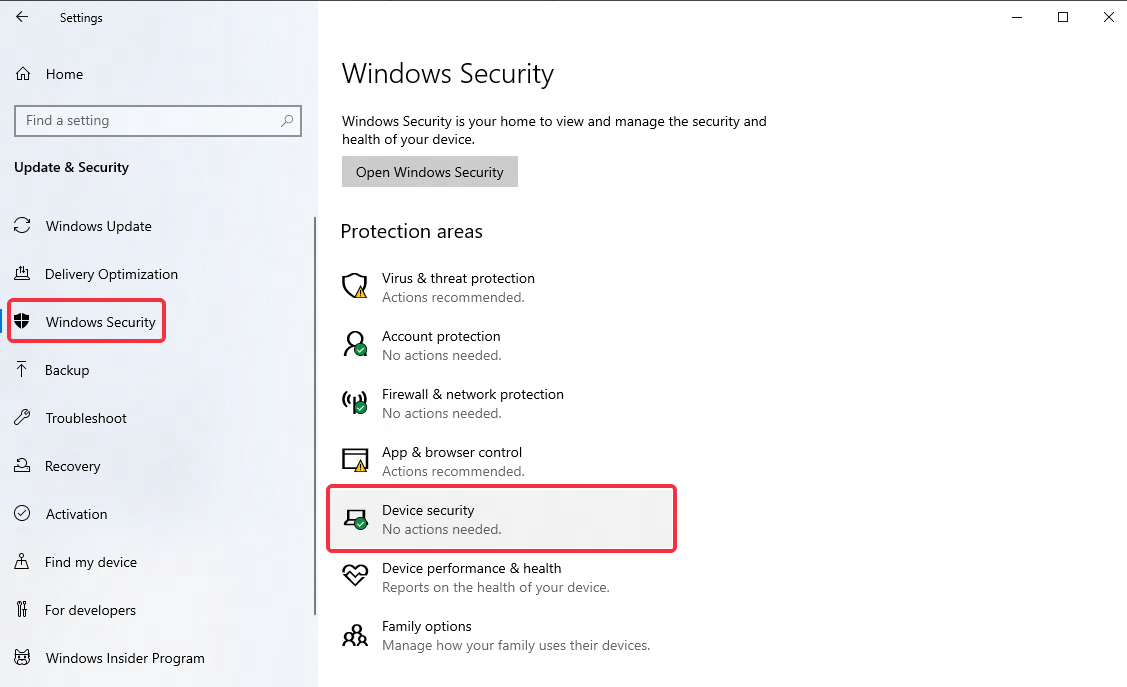
Go to Windows Settings - Update & Security - Windows Security - Device Security - Core Isolation Details and turn off Memory Integrity;
2. How to disable Hyper-V/VBS?
2.1 Run the file to automatically disable Hyper-V/VBS
Click to download the file >> Automatically disable Hyper-V/VBS. After the download is complete, right-click, run the program with administrator rights and then restart the emulator. If the automatic turn-off is not successful, please try the manual method below.
2.2 Disable Hyper-V/VBS manually
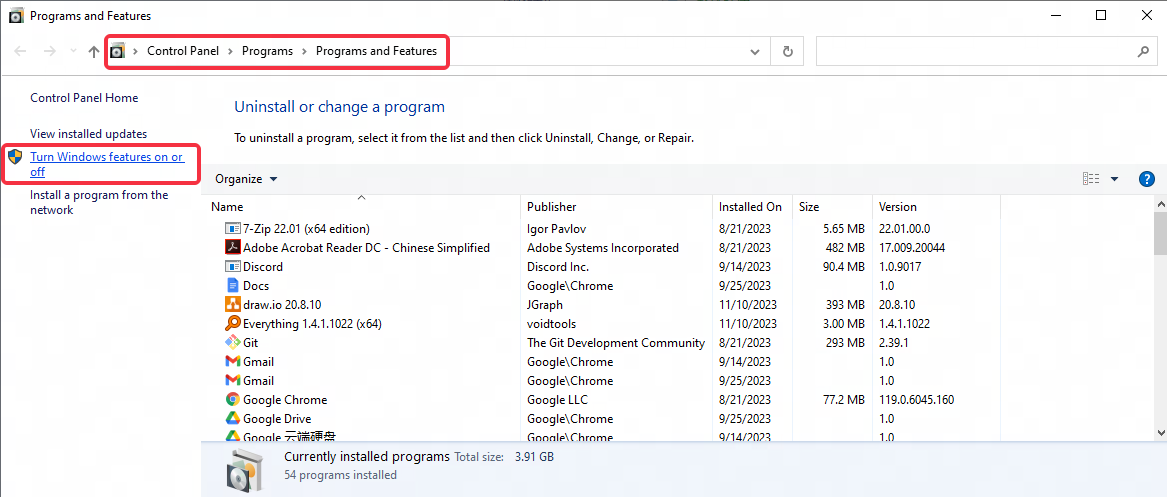
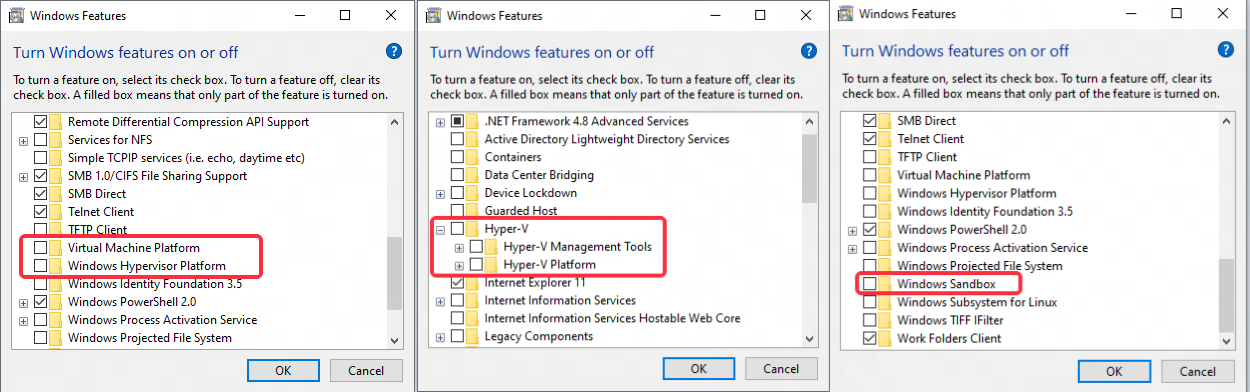
Step 1: open the interface of "This PC", enter in the address bar: Control Panel\Programs\Programs and Features, then press Enter to search;
Step 2: click "Turn Windows features on or off";
Step 3: check whether there are the following options in the menu: "Hyper-V", "Virtual Machine Platform", "Windows Hypervisor Platform", "Windows Sandbox", uncheck all of them, and restart the computer.
Generally speaking, after restarting the computer, Hyper-V/VBS will be disabled successfully. If not, please follow the steps below:
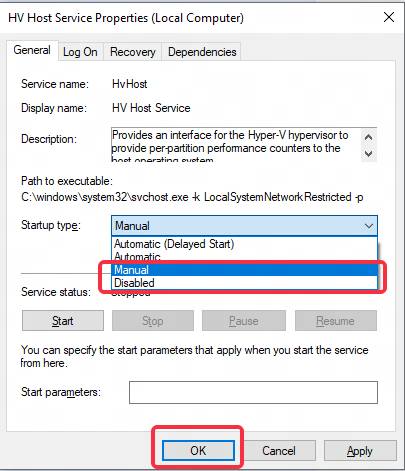
Step 1: right-click "This PC", click "Manage", jump to the interface of "Computer Management" - "Service and Applications" - "Services", find "HV Host Service"

Step 2: double click "HV Host Service", change the Startup type into "Manual" or "Disable", then click "OK".
If it is still not successful, please confirm whether there is a VMware virtual machine installed. If so, please uninstall and close >> Disable VMware service.
2.3 How to disable Hyper-V/VBS in Windows 11 Home Edition
Method 1:
Step 1: Create a text document and rename it as "Hyper-V.cmd";
Step 2: Enter the following code into the document:
pushd "%~dp0"
dir /b %SystemRoot%\servicing\Packages\*Hyper-V*.mum >hyper-v.txt
for /f %%i in ('findstr /i . hyper-v.txt 2^>nul') do dism /online /norestart /add-package:"%SystemRoot%\servicing\Packages\%%i"
del hyper-v.txt
Dism /online /enable-feature /featurename:Microsoft-Hyper-V-All /LimitAccess /ALL
Step 3: After saving the document, right-click the document and execute the file as administrator. A command window will appear. After the installation is complete, enter Y to restart the computer;
Step 4: After restarting the computer, Hyper-V is successfully installed. Now use the emulator's built-in disable function to try to disable Hyper-V, or refer to the [Manually disable Hyper-V/VBS] tutorial above to try.
Method 2:
Step 1: right-click the Start menu - Windows PowerShell (Administrator), enter: Disable-WindowsOptionalFeature -Online -FeatureName Microsoft-Hyper-V-All, then click Enter
Step 2: if still not successful, enter cmd in the taskbar search box, click run as administrator, enter: bcdedit /set hypervisorlaunchtype off, and click Enter.
If the above method still cannot help you disable Hyper-V/VBS in Windows 11 Home Edition, it is recommended to contact computer after-sales or go to the official Microsoft Community website for consultation. You can also upgrade to Windows 11 Professional Edition to solve the problem.