How to use developer support function?
2024-06-03
MuMuPlayer Pro can assist developers in application development and debugging. We currently supports managing the Android Device through Command-Line Tool, connecting to Android devices via ADB, and conveniently modifying network connection and flight mode status, etc. You can refer to the following documentation to make the most of the MuMuPlayer Pro! (Note: Please update to version 1.5.4 above to use.)
Functional Entry and Introduction
The developer related functions are located on the top menu bar of MuMuPlayer Pro and each Android device.
Open MuMuPlayer Pro and click on "Developer" to find "Open Command-Line Tool" for controlling MuMuPlayer Pro and multiple Android devices.

On each Android device, click "Developer", in addition to the Command-Line Tool, you can also find the control of the current individual Android device "Open ADB", “Restore/Disconnect from the Network,”Enable Flight Mode” etc., as well as a shortcut to “Open Developer Settings” on the current individual Android device.
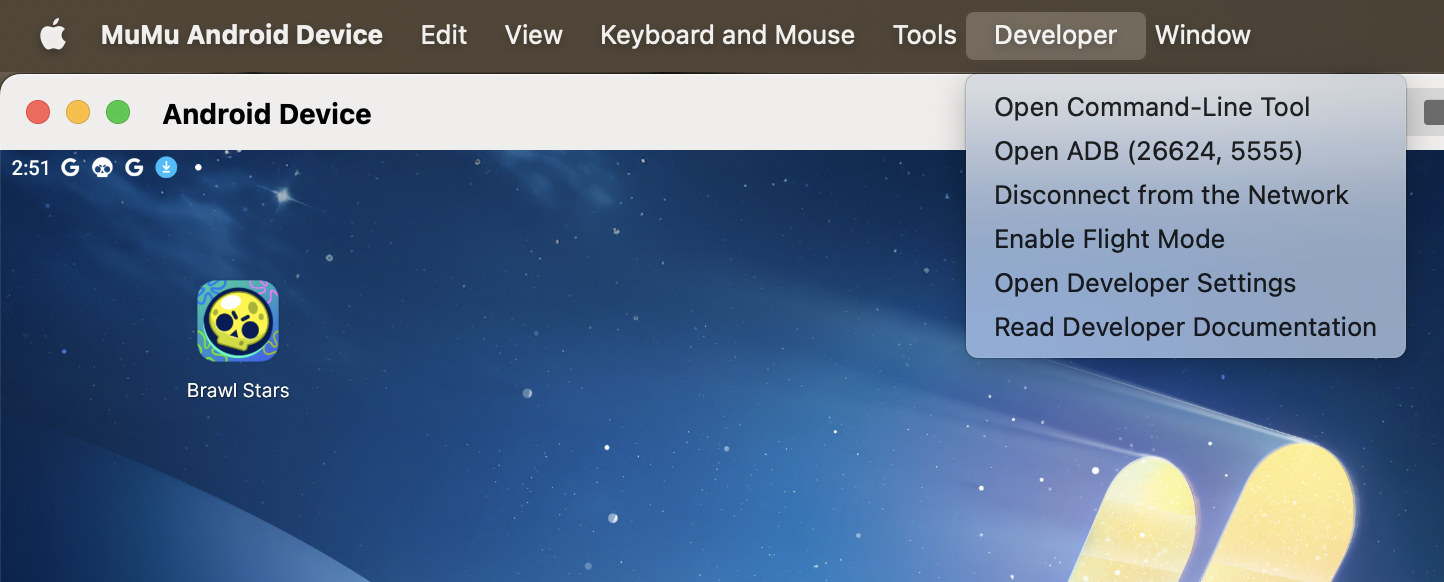
Under both menus, you can find “Read Develper Documentation" for the most up-to-date documentation on developer features.
Specific Features
3. Restore/Disconnect from the Network
1. Open Command-Line Tool
Table of Contents:
1.Where to find Command-Line Tool
2.How to use Command-Line Tool
(1) Get the server port of MuMuPlayer Pro
(2) Get info of the Android Device
(4) Clone/Delete/Open/Close/Restart the Android Device
(6) Control the Android Device
1.Where to find Command-Line Tool
(1)Open MuMuPlayer Pro.
(2)Click on the top menu bar "MuMuPlayer Pro".
(3)Click on "Open Command-Line Tool".
In the Command-Line Tool window, you can input and execute commands.

2.How to use Command-Line Tool
(1) Get the server port of MuMuPlayer Pro
· Command:
./mumutool port
· Tips:
If the server port of MuMuPlayer Pro cannot be obtained, then all the following functions will be unavailable.
(2) Get info of the Android Device
· Command:
./mumutool info <device>
· Parameters:
<device>: Select the Android Device.
· Example:
./mumutool info 0 Get info of NO.0 Android Device
./mumutool info 0,2 Get info of NO.0 and NO.2 Android Device
./mumutool info all Get info of all Android Devices
(3) Create an Android Device
· Command:
./mumutool create [--type <type>] [--setting <setting>]
· Parameters:
<type>: Select the type of Android Device to create.(values: tablet, phone)
<setting>: Select the updated config for the Android Device.
· Example:
./mumutool create --type phone Create an Android Device of a phone type
./mumutool create --setting '{"vmCpuCount":1,"vmMemoryOfMB":1024}' Create an Android Device of 1 Core, 1GB
./mumutool create --setting /path/file.json Create an Android Device by configuring a json file
* Config Tips:
Boss Key: "bossKeyEnable" : true
Customized ADB Port: "customAdbPort" : 16384,
Notch Display : "displayCutout" : 0,
Dynamic Frame Rate: "dynamicFpsEnable" : false
When MuMuPlayer Pro is running in the background, it will automatically reduce the frame rate to : "dynamicFpsLimitToLow" : 15
Confirmation when exit: "exitConfirmEnable" : true
FPS Counter: "fpsShowEnable" : false
GPU Fast Math: "gpuFastMathEnable" : false
GPU Model: "Adreno (TM) 640"
Latitude: "locationLatitude": "23.11",
Longtidu: "locationLongtitude": "133.32",
Meters Elevation: "locationMetersElevation": "",
Device MAC Addresses: "macAddress" : "92:79:16:57:58:12"
Brand: "phonePropBrand" : "Redmi"
IMEI: "phonePropIMEI" : "869874032137430"
Model: "phonePropMiit" : "23078RKD5C"
Name: "phonePropModel" : "K60 Ultra"
Graphics Enhancement: "renderQualityEnable" : false
DPI: "resolutionDPI" : 240
Display Size: "resolutionWidthHeight" : "1600x900"
Android Device id: "simulationProps" : "android_id=123456"
System Disk Mode: "systemWritable" : false
MuMu Mouse Cursor Style: "trackCursorEnable" : false
ADB: "usingNormalADBPort" : true
Handle Vibration Amplitude: "vibrationAmplitude" : 0.59999999999999998
Handle Vibration Duration Correction: 0
Handle Vibration Duration Ratio: 0.80000000000000004
CPU: "vmCpuCount" : 3
Memory: "vmMemoryOfMB" : 3072
Device Name: "vmName" : "Android Device"
Root Access: "vmRootEnable" : false
Auto Window Rotation: "windowAutoRotationEnable" : true
Custom ADB Port number:"customAdbPort":12345
Tips: Some changes will take effects on the next launch.
*Detailed information in file.json:
{
"bossKeyEnable" : true,
"customAdbPort" : 16384,
"displayCutout" : 0,
"dynamicFpsEnable" : false,
"dynamicFpsLimitToLow" : 15,
"exitConfirmEnable" : true,
"fpsShowEnable" : false,
"gpuFastMathEnable" : false,
"gpuPropModel" : "Adreno (TM) 640",
"locationLatitude" : "23.11",
"locationLongtitude" : "133.32",
"locationMetersElevation" : " ",
"macAddress" : "92:79:16:57:58:66",
"maxFpsLimit" : 144,
"phonePropBrand" : "Redmi",
"phonePropIMEI" : "869874032137430",
"phonePropMiit" : "23078RKD5C",
"phonePropModel" : "K60 Ultra",
"renderQualityEnable" : false,
"resolutionDPI" : 240,
"resolutionWidthHeight" : "1600x900",
"systemWritable" : false,
"trackCursorEnable" : false,
"usingNormalADBPort" : true,
"vmCpuCount" : 3,
"vmMemoryOfMB" : 3072,
"vmName" : "Android Device",
"vmRootEnable" : false,
"windowAutoRotationEnable" : true
"customAdbPort":12345
}
(4) Clone/Delete/Open/Close/Restart the Android Device
· Command:
Clone: ./mumutool clone <device>
Delete: ./mumutool delete <device>
Open: ./mumutool open <device>
Close: ./mumutool close <device>
Restart: ./mumutool restart <device>
· Parameters:
<device>: Select the Android Device.
· Example:
./mumutool clone 0 Clone NO.0 Android Device
./mumutool delete 0,2 Delete NO.0 and NO.2 Android Device
./mumutool open all Open all Android Devices
./mumutool close 0 Close NO.0 Android Device
(5) Config the Android Device
· Command:
./mumutool config <device> [--setting <setting>]
· Parameters:
<device>: Select the Android Device.
<setting>: Select the updated config for the Android Device.
· Example:
./mumutool config 0 --setting '{"vmCpuCount":1,"vmMemoryOfMB":1024}' Config the setting of NO.0 Android Device to 1 Core, 1 GB
./mumutool config 0,2 --setting /path/file.json Config the setting of NO.0 and NO.2 Android Device by configuring a json file
· Tips:
For "Config Tips"and"Detailed information in file.json", you can refer to "(3) Create an Android Device".
(6) Control the Android Device
①About the App
· Command:
./mumutool control <device> [--action <action>] [--package <package>] [--path <path>]
· Parameters:
<device>: Select the Android Device.
<action>: Select the action to triggered by the Android Device. (values: open_app, close_app, install_apk, uninstall_app, app_status)
<package>: Select the android package bundle ID by the Android Device. Required for actions: open_app, close_app, uninstall_app, app_status.
<path>: Select apk/apks/xapk file path to install by the Android Device. Required for actions: install_apk.
· Example:
./mumutool control 0,2 --action install_apk --path /path/QooApp.apk Install apk for NO.0 and NO.2 Android Device
./mumutool control 0 --action open_app --package com.qooapp.qoohelper Open apk for NO.0 Android Device
./mumutool control 0 --action close_app --package com.qooapp.qoohelper Close apk for NO.0 Android Device
./mumutool control 0 --action uninstall_app --package com.qooapp.qoohelper Uninstall apk for NO.0 Android Device
./mumutool control 0 --action app_status --package com.qooapp.qoohelper App status in NO.0 Android Device
· Tips:
You need to run the corresponding emulator for your command to take effect.
②About Tools
· Command:
./mumutool control <device> [--action <action>] [--type <type>]
· Parameters:
<device>: Select the Android Device.
<action>: run_tool
<type>: Select the toolbar type for the Android Device. required for actions: run_tool. (values: goBack, goHome, showActivity,showVolumePanel, addVolume, reduceVolume, muteVolume, rotation, shake)
· Example:
./mumutool control 0 --action run_tool --type goBack Activate "Go Back" on NO.0 Android Device
./mumutool control 0 --action run_tool --type goHome Activate "Go Home" on NO.0 Android Device
./mumutool control 0 --action run_tool --type showActivity Activate "Open recent Apps" on NO.0 Android Device
./mumutool control 0 --action run_tool --type showVolumePanel Show Volume on NO.0 Android Device
./mumutool control 0 --action run_tool --type addVolume Increase volume by 1 on NO.0 Android Device
./mumutool control 0 --action run_tool --type reduceVolume Decrease volume by 1 on NO.0 Android Device
./mumutool control 0 --action run_tool --type muteVolume Turn on/off mute button on NO.0 Android Device
./mumutool control 0 --action run_tool --type rotation Change the window rotation on NO.0 Android Device
./mumutool control 0 --action run_tool --type shake Activate "Shake" on NO.0 Android Device
· Tips:
You need to run the corresponding emulator for your command to take effect.
③About CMD
· Command:
./mumutool control <device> [--action <action>] [--cmd <cmd>]
· Parameters:
<device>: Select the Android Device.
<action>: run_tool
<cmd>: Select command to run by the Android Device. required for actions: run_cmd.
· Example:
./mumutool control 0 --action run_cmd --cmd "input tap 300 400" run CMD on NO.0 Android Device
④ About Device Storage (import/export/move your Android Device)
· Import your Android Device
· Command:
./mumutool import [--count <count>] [--path <path>]
· Parameters:
<count>: Select one or more /path/file.mad file path to import the Android Device.
<path>: Select /path/file.mad file path to import the Android Device.
· Example:
./mumutool import --count 1 --path /path/file1.mad --path /path/file2.mad Use file1.mad、file2.mad files to import your Android Device by link
./mumutool import --count 2 --path /path/file.mad Use file.mad file to import your Android Device by copying
· Tips:
count=1, mad file will be added to import.(default)
count>=2, mad file will be cloned to import.
· Export your Android Device
· Command:
./mumutool export <device> [--dir <dir>]
· Parameters:
<device>: Select the Android Device.
<dir>: File Directory.
· Example:
./mumutool export 0 --dir /path/ Export NO.0 Android Device to a specified directory
./mumutool export 0,2 --dir /path/ Export NO.0 and NO.2 Android Device to a specified directory
./mumutool export all --dir /path/ Export All Android Devices to a specified directory
· Move your Android Device
· Command:
./mumutool move <device> [--dir <dir>]
· Parameters:
<device>: Select the Android Device.
<dir>: File Directory.
· Example:
./mumutool move 0 --dir /path/ Move NO.0 Android Device to a specified directory
./mumutool move 0,2 --dir /path/ Move NO.0 and NO.2 Android Device to a specified directory
./mumutool move all --dir /path/ Move All Android Devices to a specified directory
⑤ About Device Display (Show/Hide your Android Devices)
· Show all your Android Devices
· Command:
./mumutool show
· Hide all your Android Devices
· Command:
./mumutool hide
2. Open ADB
MuMuPlayer Pro supports connecting Android devices via ADB. After starting an Android device, click "Open ADB (device port number)" under "Developer" in the Mac menu bar to automatically open the ADB shell and start executing other commands conveniently.
If you need to check the port number of the running Android device, you can also check it here.

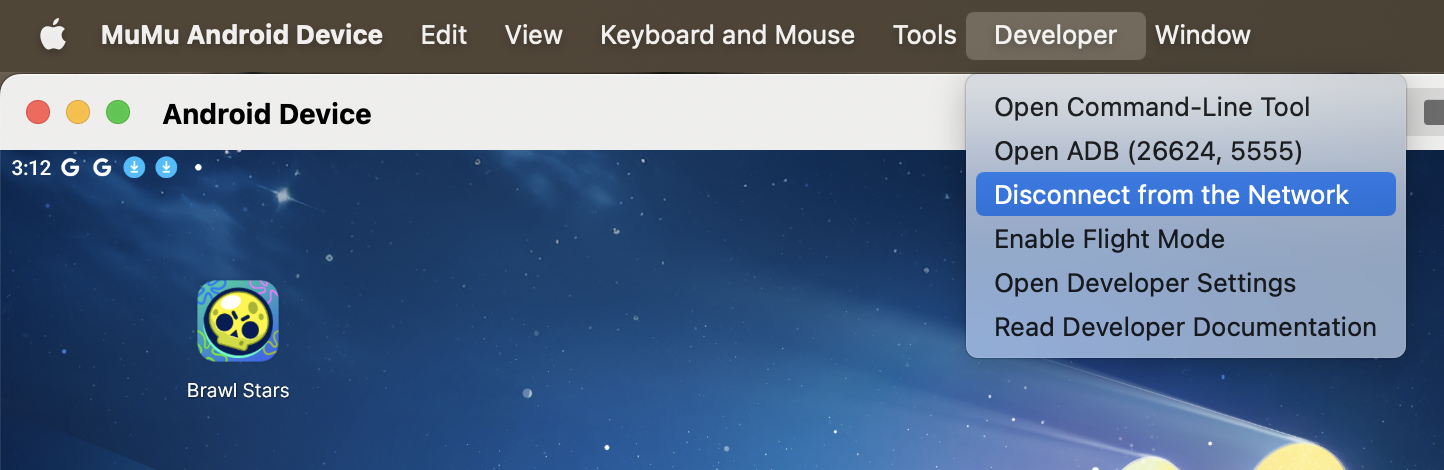
3. Restore/Disconnect from the Network
MuMuPlayer Pro supports disconnecting and restoring the network connection of Android devices, assisting developers to test the performance of their apps in case of disconnection.
1. Network Status Alert
When the Android device is connected to the network, the WLAN icon will be displayed in the notification bar at the top-right corner of the Android device, from which you can judge that it is connected to the network, and if it is disconnected from the network, the icon will not be displayed.

2. Restore/Disconnect from the Network
When you are connected to the Internet, you can click "Developer - Disconnect from the Network" to disconnect from the Internet, and the same operation to restore the Internet connection.
4. Enable/Disable Flight Mode
MuMuPlayer Pro supports to enable the flight mode of Android devices to assist developers in testing the performance of apps in flight mode.
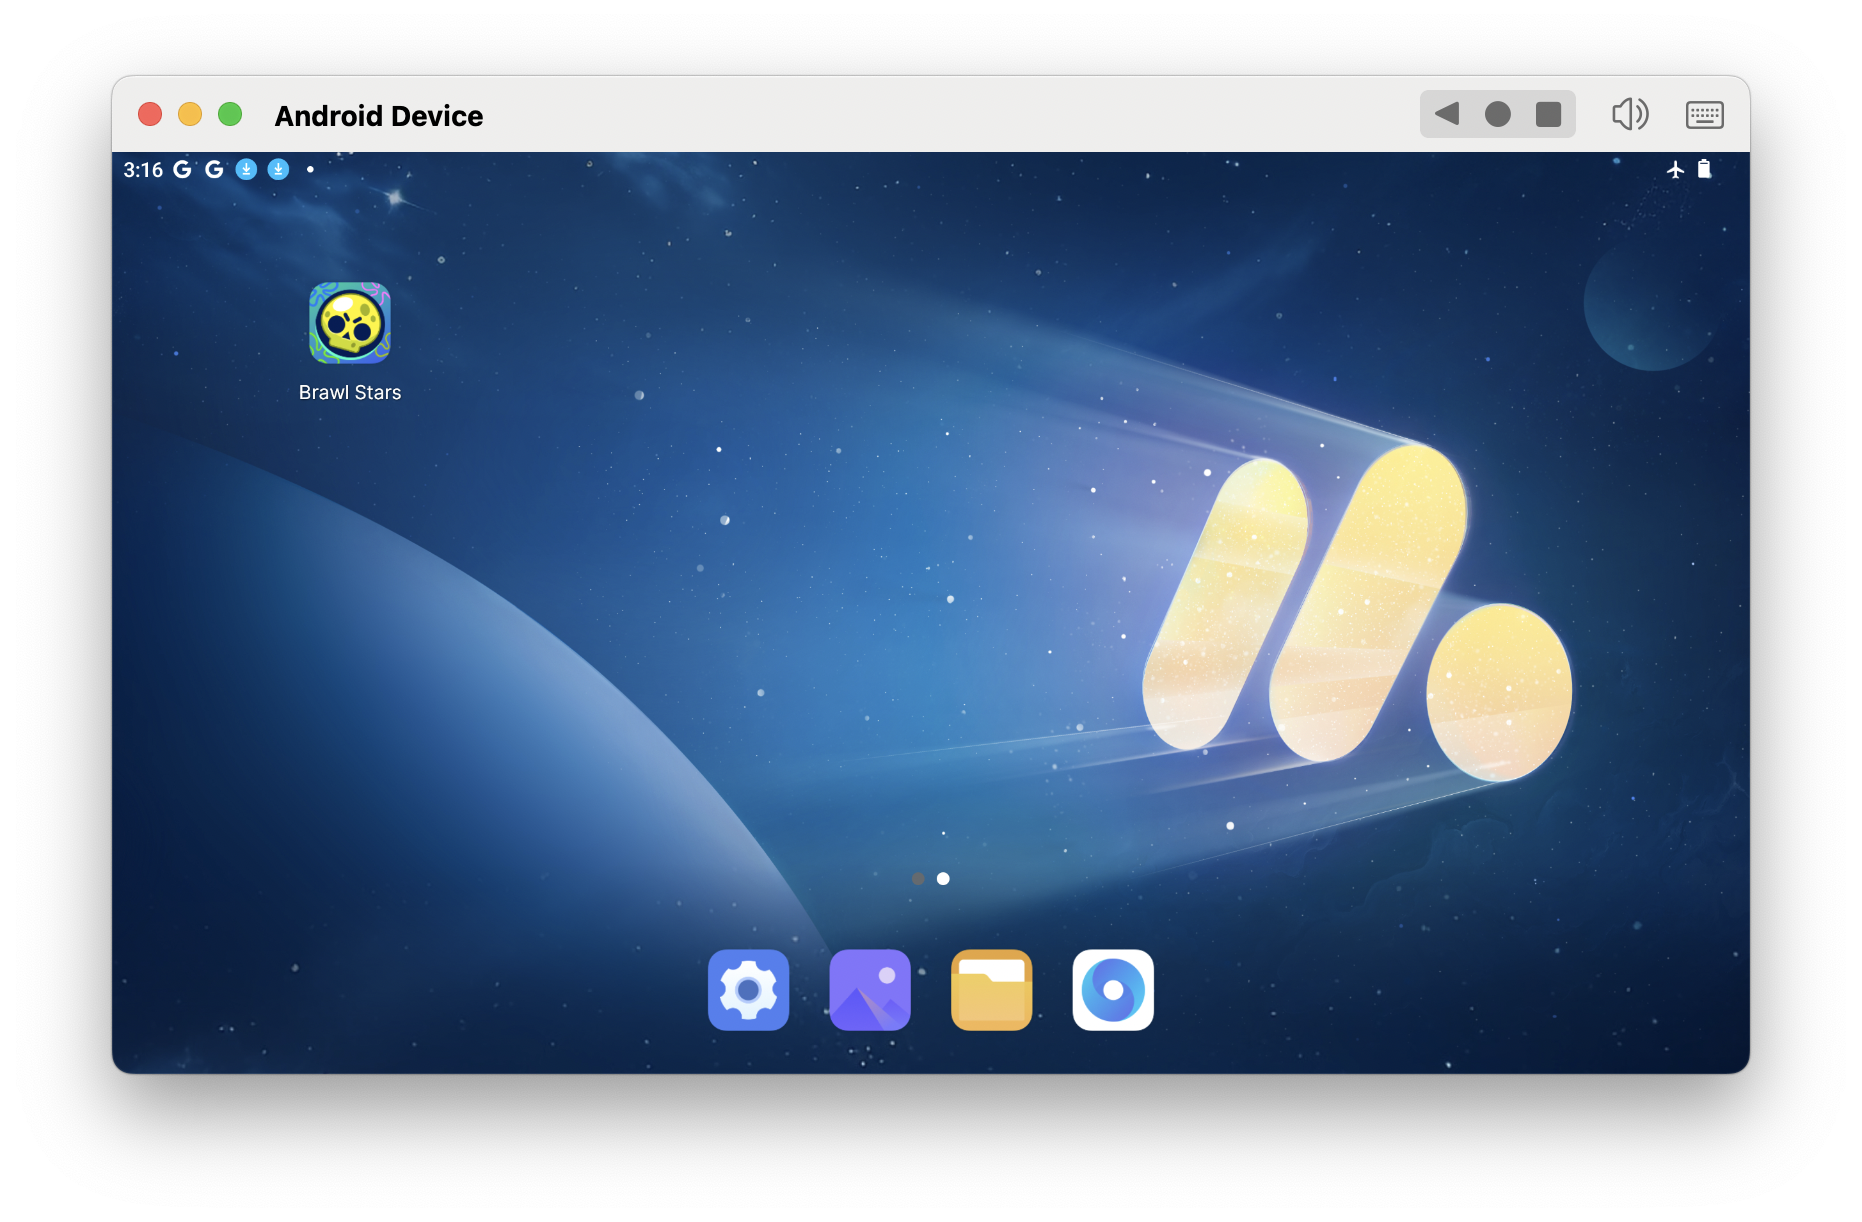
1. Flight Mode Status Alert
When the Android device is in flight mode, an aircraft icon will be displayed in the notification bar at the top-right corner of the Android device, from which you can judge that the flight mode is on, and if it is off, the icon will not be displayed.
2. Enable/Disable Flight Mode
When the flight mode is off, you can click "Developer - Enable Flight Mode" to turn on the flight mode, and the operation of turning off the flight mode is the same.
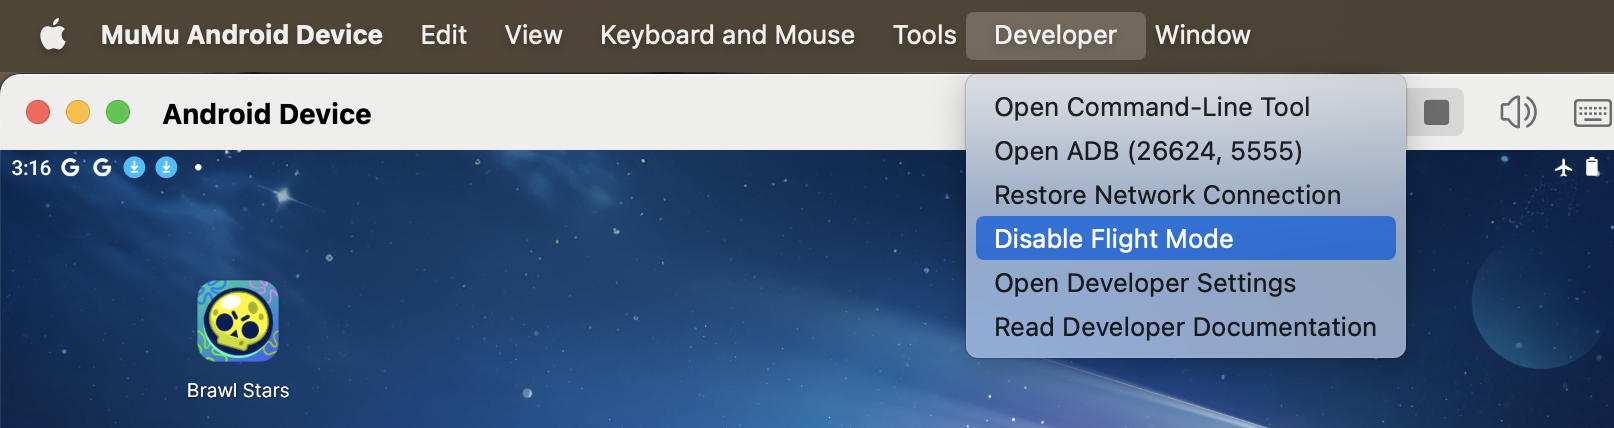
Note that when you turn on Airplane Mode, you will be disconnected from the network at the same time, you can manually restore the network connection again if necessary.
5. Open Developer Settings
MuMuPlayer Pro integrates the common developer settings under "Developer", which can be quickly opened from the menu bar "Developer - Open Developer Settings".
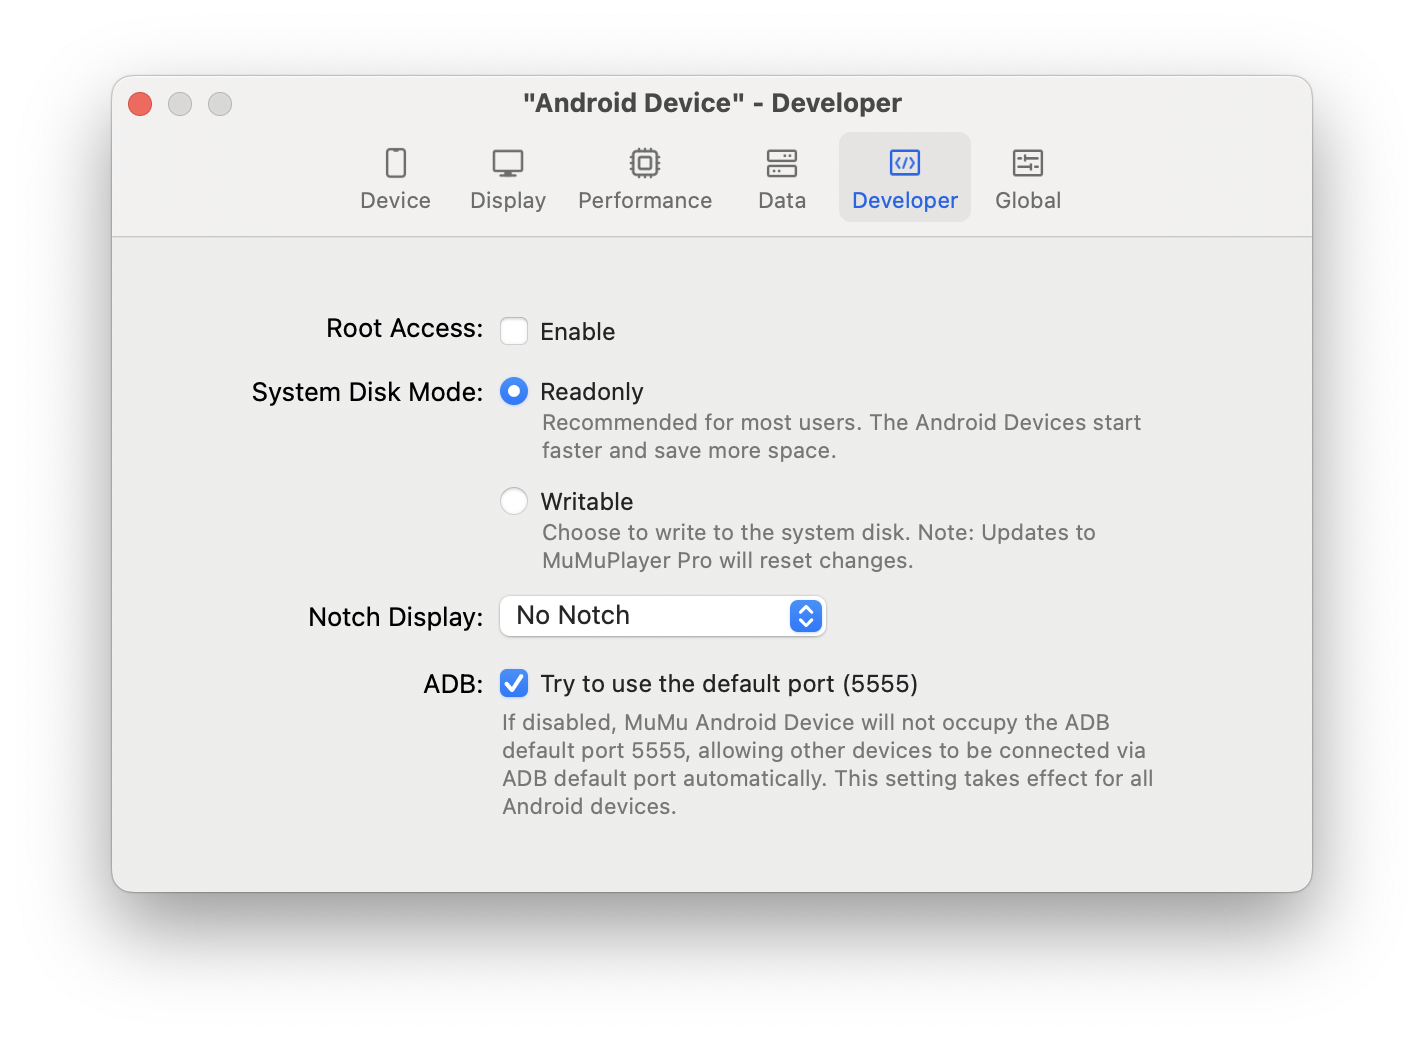
MuMuPlayer Pro provides developers with the following setting items:
1. Root Acess: You can enable the Root Access of your phone, which is suitable for accessing or modifying system files and directories, viewing system level logs, network traffic analysis or packet capturing, etc.
2. System Disk Mode: you can select “Writable” to modify the system disk, which is suitable for changing system properties, modifying the built-in APK and Magisk, etc.
3. Notch Display: you can choose different styles of bangs screen (No Notch, Center Punch Hole, Top Left Punch Hole, Top Right Punch Hole, Center Notch, Teardrop), which is suitable for testing the display effect of the application interface under different bangs screens.
4. ADB: Use ADB default port (5555) is ticked by default. When enabled, devices other than MuMu Android devices can automatically connect via the ADB default port. This option is a global setting and takes effect for all MuMu Android devices.
MuMuPlayer Pro will continue to optimise and adapt developer features. Should you have any other questions,please feel free to contact us for feedback!
End of Article
Keyword:
Developer Command-Line Tool